 BUY
Using Natural Light: Simple Product Photography (Part 1)
This guide is the first of a two part series on product photography aimed to show you how to take great photos that are ready to use without editing.
Producing fantastic product photos is essential for any small business. Photos are often the first interaction people will have with your product and that can mean the difference between a customer pausing to purchase or to continue scrolling.
Getting clean and consistent product shots can seem impossible to a lot of people, especially if you’ve become accustomed to taking photos with your smartphone. Beginning to use professional camera equipment can often be quite daunting. Luckily the process of product photography is surprisingly simple once you’ve learned a trick or two. Part one covers how to setup a shoot using natural light for a clean and simple look. Part two covers how to create a simple flash setup and part three compares the two results.
The Pros and Cons of Natural Light
There are a few pros to using natural light and one big con. Natural light can often appear to be the simplest and easiest way to produce photographs, however it can lead to unexpected headaches, particularly when photographing for e-commerce. You’ll need to look at the pros and cons of natural light based on your photographic knowledge and skillset, and decide whether you want to stick with it or do a more advanced setup with flash.
Pros
Natural lighting is cheap
The big drawcard of natural light is that it’s the most affordable way to make images. The equipment used in this setup is inexpensive to rent, and makes producing nice looking images accessible to everybody, not matter how tight the budget is.
What you see is what you get
As you are using the light in the room around you, what you see with your eyes will be similar to what the camera captures. This makes it easier for beginners to visualise the final photo.
The equipment is simple
There aren’t too many things to get stuck on with this setup. The equipment will work with any camera and lens and is simple to set up and use.
Cons
Natural lighting is inconsistent
There is one big con to using natural light — it’s impossible to maintain consistency between shots when you are at the mercy of the elements. Light can often change on a shot by shot basis as the conditions outside change and although this can be accounted for in some respects through the camera settings we will choose you will never get the consistent look that is achievable with flash.
Light will change in brightness, colour and direction at different times throughout the day. Light will look different on cloudy days compared to sunny ones, and of course you’ll be limited to shooting within daylight hours. You’ll likely be able to produce great looking single images using natural light, but when you put a number of them together in something like a web store, the variation between them will be glaringly obvious.
Choosing a space to shoot in
The setup in this guide is suitable for recreating in any home or office environment. When selecting a place to shoot, you want to choose the brightest room you have available with at least one large, accessible window. The more light that is let into the space, the better, although indirect light is easier to work with than direct sunlight.
A room with white walls and ceilings is ideal and will help to bounce the light around the space and improve overall brightness. Any neutral coloured wall paint will be fine, however avoid rooms with strong colours, as these will be reflected onto the product and make it difficult to get good shots.
A larger space is always easier to work in than a smaller one, but you’ll want a minimum of 2x2.5m to comfortably fit in the equipment.
EQUIPMENT LIST
- Canon EOS 5D Mark IV and Canon EF 100mm f/2.8 L Macro IS USM
- Sandisk Extreme Pro 64gb SDXC I V30 170mb/s
- Manfrotto Midweight Tripod with 3-Way Head
- Backdrop Support Stand and Paper Backdrop
- Manfrotto Light Stand and Godox Reflector Mounting Arm RH-01
- Promaster Reflector 5-in-1 (40 x 60 inch)
- Promaster Reflector 5-in-1 (31 inch)
- Table, tape and clamp
Hire the gear used in this guide
- Natural Light Product Photography Kit
Setting the scene
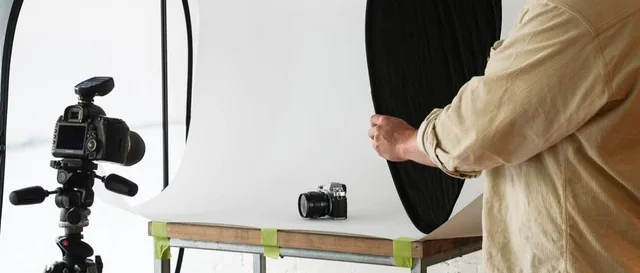
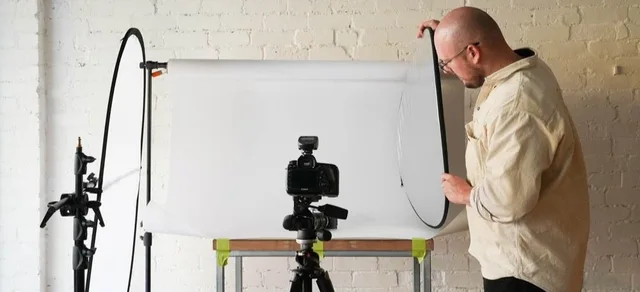
The first thing to set up is the table and backdrop. Set the backdrop support stand up at its minimum height and slide the backdrop through the horizontal hole. You want the backdrop to unravel from the back, rather than the front, so that you are working with the curve of the paper. Once this is done, screw the horizontal pole into the top of the stands and go back and forth between them, raising the stands up a little bit at a time until you’ve reached the height you need for your product.
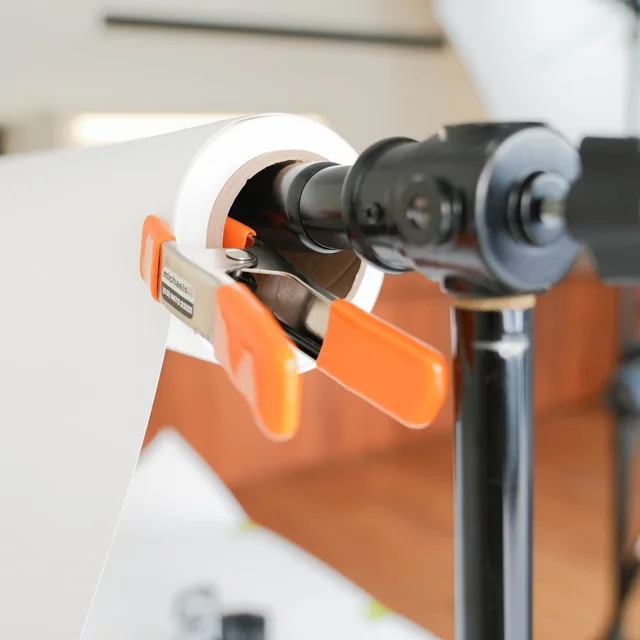
Unravel the paper until it forms a loose 90 degree angle with enough paper to reach the front edge of your table. You want to maintain a small curve in the backdrop as this will create a seamless look to your image. Prevent the backdrop from unravelling by pinning it with a clamp along the roll and tape the edge to the front of the table.
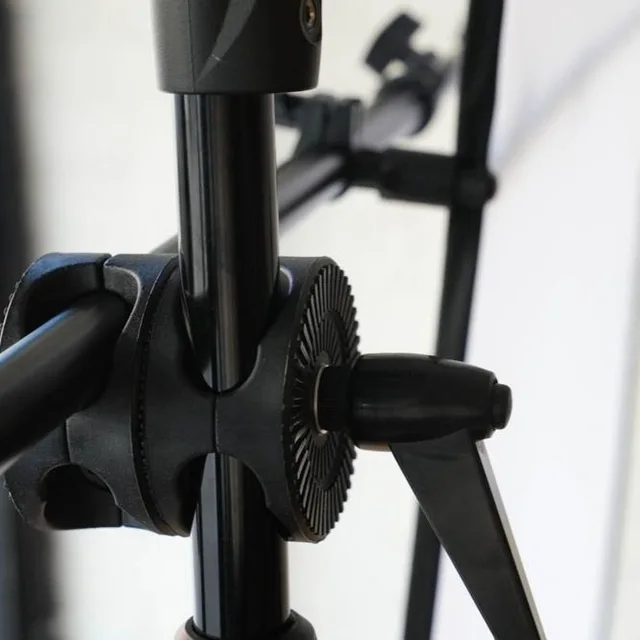
Next we want to set up the large diffuser. Remove the diffuser from its case and take off the reflective sleeve. Attach the reflector arm to the light stand and extend it so that it is approximately the same width as the diffuser. Clamp the diffuser in and adjust the length of the arm as needed. Place this as close to the table as you can, and make sure that it is casting soft, diffused light over the scene.
Depending on the size of your window, and how bright the rest of your room is, you may want to fill in the shadows and even out the lighting with a reflector on the opposite side of the product. The silver side will reflect a strong, direct light and the white side will reflect a subtle, diffuse light. Make sure you are using the window as your only light source, turning off any other lights you may have in the room. Now you can pop your product on the table and begin to set up the camera!
Composing the image
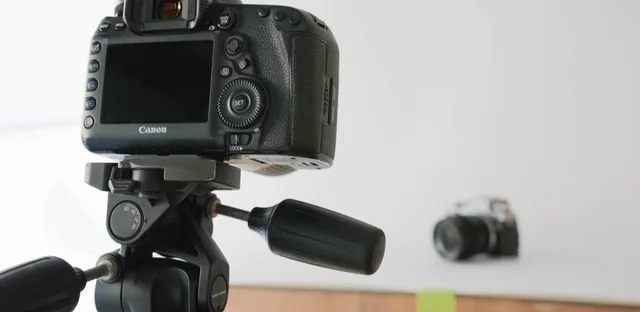
Before we change any of the camera settings we first want to get our composition sorted. It’s important to use a tripod while shooting products as this will keep the look and feel of the images consistent between shots. If you plan to also take more photos at a later stage, it’s worthwhile noting the height and distance of the tripod so that you can replicate this look down the track.
Most lenses are capable of taking good product photos, however the focal length you choose is important. A ‘short telephoto’ lens will be ideal, with somewhere around the 50-100mm mark (full frame equivalent) being good for most products. Rather than zooming in or out, move the camera and tripod back and forth until you are happy with framing. For website stores square images are most useful, so leave enough room on the top and bottom of your frame to achieve a square crop when you are uploading your photos.
It looks good to place your product slightly towards the bottom of the frame rather than smack-bang in the middle. The height of the camera can vary depending on the look you want to go for, but things will generally look best if the camera is low and face-on to the product. If the top of the product is essential to capture, then you can raise this a bit and adjust the angle of the camera downwards.
Setting up the camera
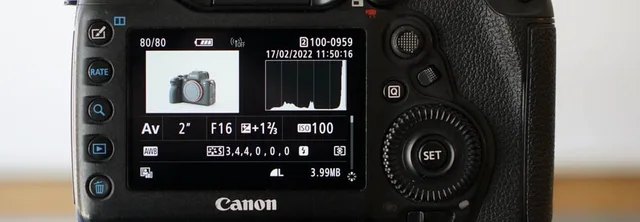
The camera settings used for natural light are relatively straightforward. We know that there will likely be changes in colour and brightness while we are capturing images, so its best to use settings that will help account for some of this variation. Our recommended settings for natural light product photography are:
- Aperture Priority mode (recommended apertures: f/8 for large products, f/11 for medium and f/16 for small)
- Auto White Balance
- +2 Exposure Compensation
- ISO 100 (or lowest option available)
- Self timer set for 5-10 seconds
Once you’ve chosen these settings, press the shutter button and hold the reflector up before the self timer runs out. Once you’ve taken a photo, go back to the camera to evaluate the photo and check the exposure and focus.
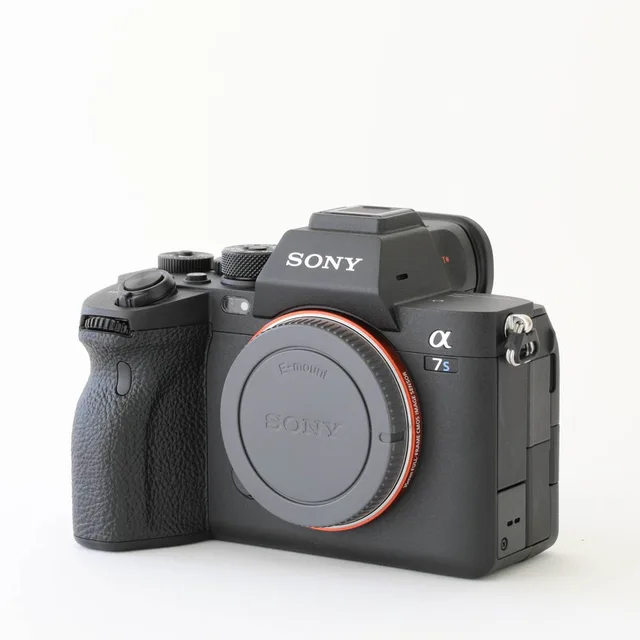
Zoom into the image to check focus closely. If you are missing focus, moving to manual focus and dialling this in will likely give you better results. Next check your exposure based on the photos histogram. The aim is to capture a narrow, tall spike towards the right hand side of the histogram, indicating a white and evenly lit background. If this spike is touching the right hand side it means you’ve reached pure white, which can be good for e-commerce. However, you so need to be careful of also losing detail in your product, particularly if it has light colours like the silver of our camera. A safer bet will be to get this spike close to the right hand side without touching. To adjust the exposure, adjust your exposure compensation lower to darken, or higher to brighten the image.
Once you are happy with your photo, you can move onto the next product with the settings you’ve dialled in.