 BUY
Using Flash: Simple Product Photography (Part 2)
Producing fantastic product photos is essential for any small business. In the era of social media and the internet, photos are often the first interaction people will have with a product, and can mean the difference between them stopping to buy or scrolling onto the next thing.
Getting clean and consistent product shots can seem impossible to a lot of people, especially those who are used to taking photos with their smartphone. Beginning to use professional camera equipment can be daunting. Luckily, however, the process of product photography is surprisingly simple once you’ve learned a trick or two. This guide is the second of a three part series on product photography aimed to show you how to take great photos that are ready to use without editing. Part two covers how to setup a shoot using flash for a clean and simple look. Part one covers a setup using natural lighting and part three compares the two.
The Pros and Cons of Flash
Flash is the choice for most professional product photographers and for good reason. Photographers like control, and flash gives consistent looking images shot after shot. The setup discussed in this article is as simple as you can get, using a single overhead flash to product nice images straight out of camera. The setup we create is designed to be as simple as possible, and something that can be replicated by someone with next to no photographic experience. Once you’ve mastered this however, there is no end to the ways you can use flash to make your photos really pop.
Pros
Flash is consistent
Flash is king when it comes to product photography for the simple reason that it is consistent and replicable. When using flash you can be confident that each time you click the shutter you’ll be getting the same result as the last time, giving the photos that ‘professional’ quality.
Flash is quick
While flash can be fiddly to get going, once things are set up you can work very quickly. Photos take a fraction of a second to take, compared to 5-10 seconds for natural light. When you are shooting dozens or hundreds of products this means you save a lot of time over the span of a shoot. As the images are consistent, this also allows you to batch edit in post processing, saving you time on the computer.
Cons
Flash is more expensive
Flash gear is more expensive to rent so it’s best to have lots to shoot to get the most out of the equipment. Although the outright cost is higher, time is money, and considering you work much quicker with flash you, it may actually work out to be more cost effective in the long run.
Flash can be daunting
People are often afraid of things they are unfamiliar with and if you haven’t used flash before it can often seem complicated. This complexity is largely a misnomer however and great results can be achieved in most situations with simple setups.
You don’t know what the photo looks like until it’s captured
As the flash doesn’t go off until the photo is taken, it can sometimes be surprising to see how different the photo looks to what you see in front of you. The effect of the flash can be mimicked using the unit’s modelling light, however to use this you need a darkened room.
Choosing a space to shoot in
The setup in this guide is suitable for recreating in any home or office environment. You can use essentially any space with flash as long as you have enough room, however if you want to use the modelling lights you’ll need somewhere dark.
A room with white walls and ceilings is ideal as this will help to bounce the light around the space and improve overall brightness. Any neutral coloured wall paint will be fine, however avoid rooms with strong colours, as these will be reflected onto the product and make it difficult to get good shots.
A larger space is always easier to work in than a smaller one, but you’ll want a minimum of 2.5x2.5m to comfortably fit in the equipment.
Equipment list
There are several pieces of equipment used for the shoot in this article:
- Canon EOS 5D Mark IV and Canon EF 100mm f/2.8 L Macro IS USM
- Sandisk Extreme Pro 64gb SDXC I V30 170mb/s
- Manfrotto Midweight Tripod with 3-Way Head
- Backdrop Support Stand and Paper Backdrop
- Profoto B10
- Manfrotto Light Stand
- Profoto OCF Softbox 2x3’
- Profoto Air Trigger
- Table, tape, cardboard and clamp
Setting up the scene
The first thing to set up is the table and backdrop.
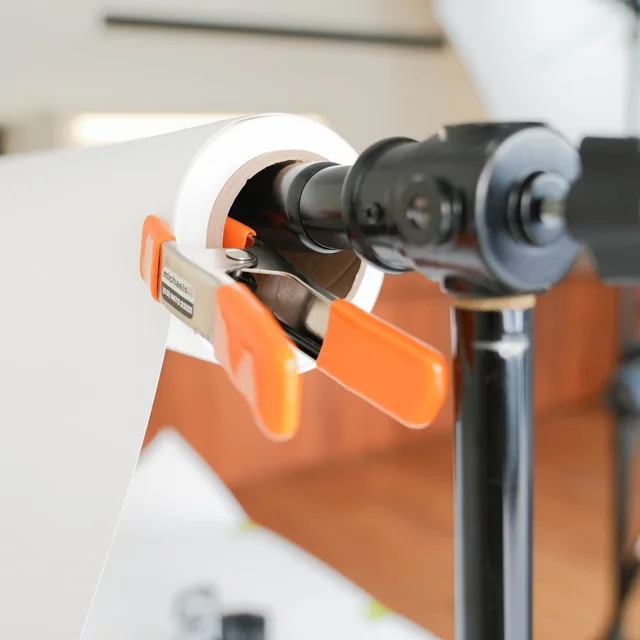
- Set the backdrop support stand up at its minimum height and slide the backdrop through the horizontal hole. You want the backdrop to unravel from the back, rather than the front, so that you are working with the curve of the paper.
- Once this is done, screw the horizontal pole into the top of the stands and go back and forth between them, raising the stands up a little bit at a time until you’ve reached the height you need for your product.
- Unravel the paper until it forms a loose 90 degree angle with enough paper to reach the front edge of your table. You want to maintain a small curve in the backdrop as this will create a seamless look to your image.
- Prevent the backdrop from unravelling by pinning it with a clamp along the roll and tape the edge to the front of the table.
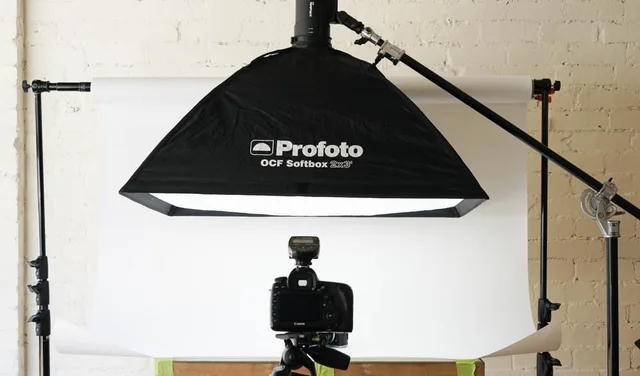
With flash its often easiest to set up the light first, particularly when using a boom stand.
- Set the softbox up, rest it on the table facing downwards and connect the strobe.
- Turn the strobe and trigger on and check they are on the same number channel, remembering which letter group the strobe is set to.
- Pull out the boom from the boom stand and tilt until it is parallel with the ground and over the top of one of the legs.
- Secure the boom so that it sits about in the middle of the stand, but leave enough room to reach over into the centre of the table.
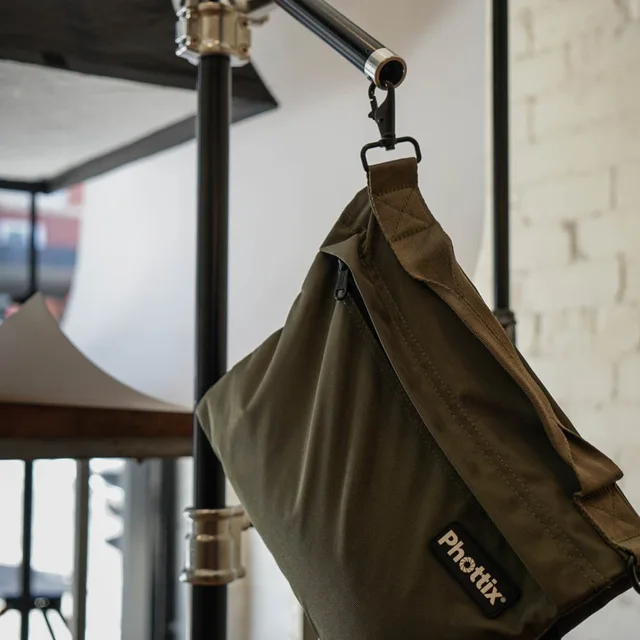
- Next, raise the height of the stand so that the boom arm is level with the strobes spigot connection and screw the two together. Attach a sandbag to the opposite end of the pole, loosen the tilt knob and then tilt the arm up until the designed height. Then make adjustments on the strobe tilt so that the light is pointed downwards.
Composing the image
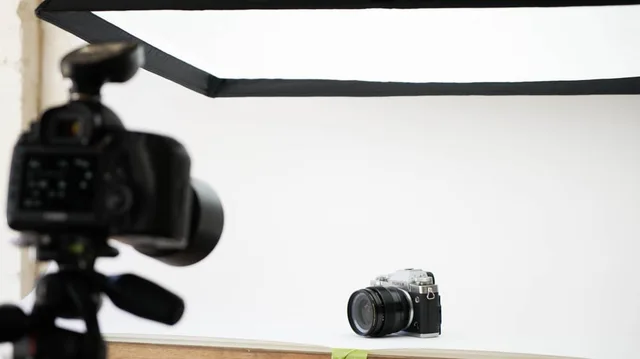
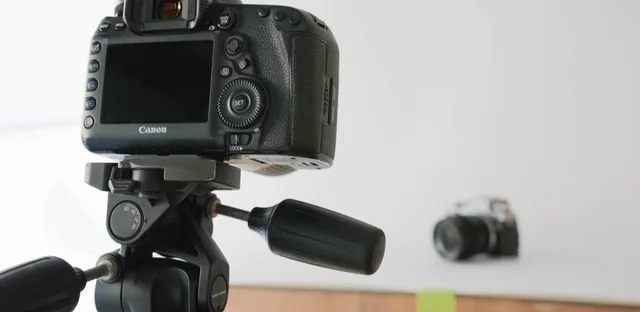
Before we change any of the camera settings we first want to get our composition sorted. It’s important to use a tripod while shooting products as this will keep the look and feel of the images consistent between shots. If you plan to also take more photos at a later stage, it’s worthwhile noting the height and distance of the tripod so that you can replicate this look down the track.
Most lenses are capable of taking good product photos, however the focal length you choose is important. A ‘short telephoto’ lens will be ideal, with somewhere around the 50-100mm mark (full frame equivalent) being good for most products. Rather than zooming in or out, move the camera and tripod back and forth until you are happy with framing. For ecommerce stores, square images are most useful, so leave enough room on the top and bottom of your frame to achieve a square crop when you are uploading your photos.
It looks good to place your product slightly towards the bottom of the frame rather than dead centre. The height of the camera can vary depending on the look you want to go for, but things will generally look best if the camera is low and face-on to the product. If the top of the product is essential to capture, then you can raise this a bit and adjust the angle of the camera downwards.
Setting up the camera
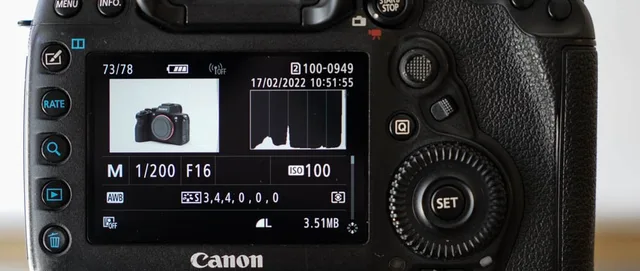
The camera settings used for flash light are straightforward. Once things are dialled in we shouldn’t need to fiddle with settings too much as the light will be perfectly consistent with each shot. Our recommended settings for flash product photography are:
- Manual mode
- Recommended apertures: f/8 for large products, f/11 for medium and f/16 for small
- Shutter speed set to flash sync speed, 1/200th for most camera
- ISO 100 (or lowest option available)
- Flash white balance
Once you’ve chosen these settings, press the shutter button and see how the exposure looks. The best way to do this is by looking at the photos histogram. The aim is to capture a narrow, tall spike towards the right hand side of the histogram, indicating a white and evenly lit background. If this spike is touching or mashed into the right hand side it means you’ve reached pure white, which can be good for ecommerce, however, you also need to be careful of also losing detail in your product, particularly if it has light colours. A safer bet will be to get this spike close to the right hand side as you can without touching. To adjust the exposure, adjust your flash power via the trigger, lowering it to darken, or increasing it to brighten the image.
Zoom into the image to check focus closely. If you are missing focus, moving to manual focus and dialling this in will likely give you better results.
Adding some fill light
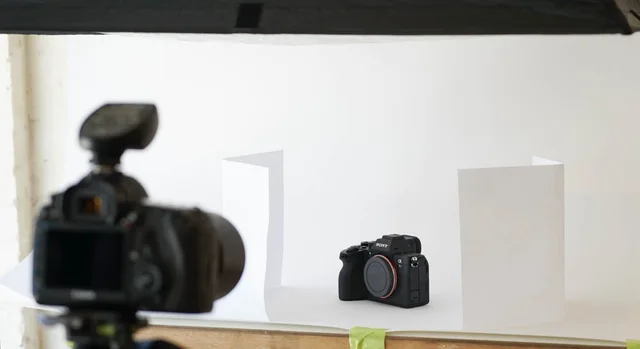
One of the drawbacks to this overhead light is that you may notice you aren’t getting enough light on the front of your product, particularly if it is dark. It’s quite easy to rectify this however by adding in some bounce cards. This can be done by setting up more flashes, however often good results can be achieved by simply adding in some white cardboard to act as a reflector and push some light in from the sides of the product. I didn’t have any cardboard while writing this article, however some standard office paper was a fairly acceptable substitute to fill in the shadows a bit on the sides of the camera.
Hire the gear used in this guide
- Canon EOS 5D Mark IV with EF 100mm Macro Kit
- SanDisk Extreme Pro 64GB SDXC I V30 170MB/s
- Manfrotto XPRO3 with MHXPRO 3-Way Head
- Backdrop Support Stand with Paper Backdrop
- Manfrotto Light Stand
- Profoto B10 250 + 250 Kit
- OCF Softbox 2x3